Earlier this year I had the chance to play a Gibson SG and I immediately found it to be the perfect size and shape for me. I don't play 6 string instruments much anymore, so I began thinking about how to make a 4 string version.
About a month ago I found an inexpensive, used Epiphone SG VE and I decided to convert it to a 4 string. I have another instrument that's working fine for me at the moment, and I've had my hands full with customer instruments, so I haven't made too much progress on this yet. However, I thought I would share what I have done so far.
Here is a stock photo of the headstock it came with...
 The first thing I did was pull off the tuning machines and cut some circular plugs from mahogany stock to fill the two middle holes on either side. After they were securely glued in place, I lightly sanded the headstock to remove the logo and smooth out the two plugs. I used an airbrush with some black tinted satin lacquer to spray a light coat over the top, and finally I installed some better tuners with an antique brass finish.
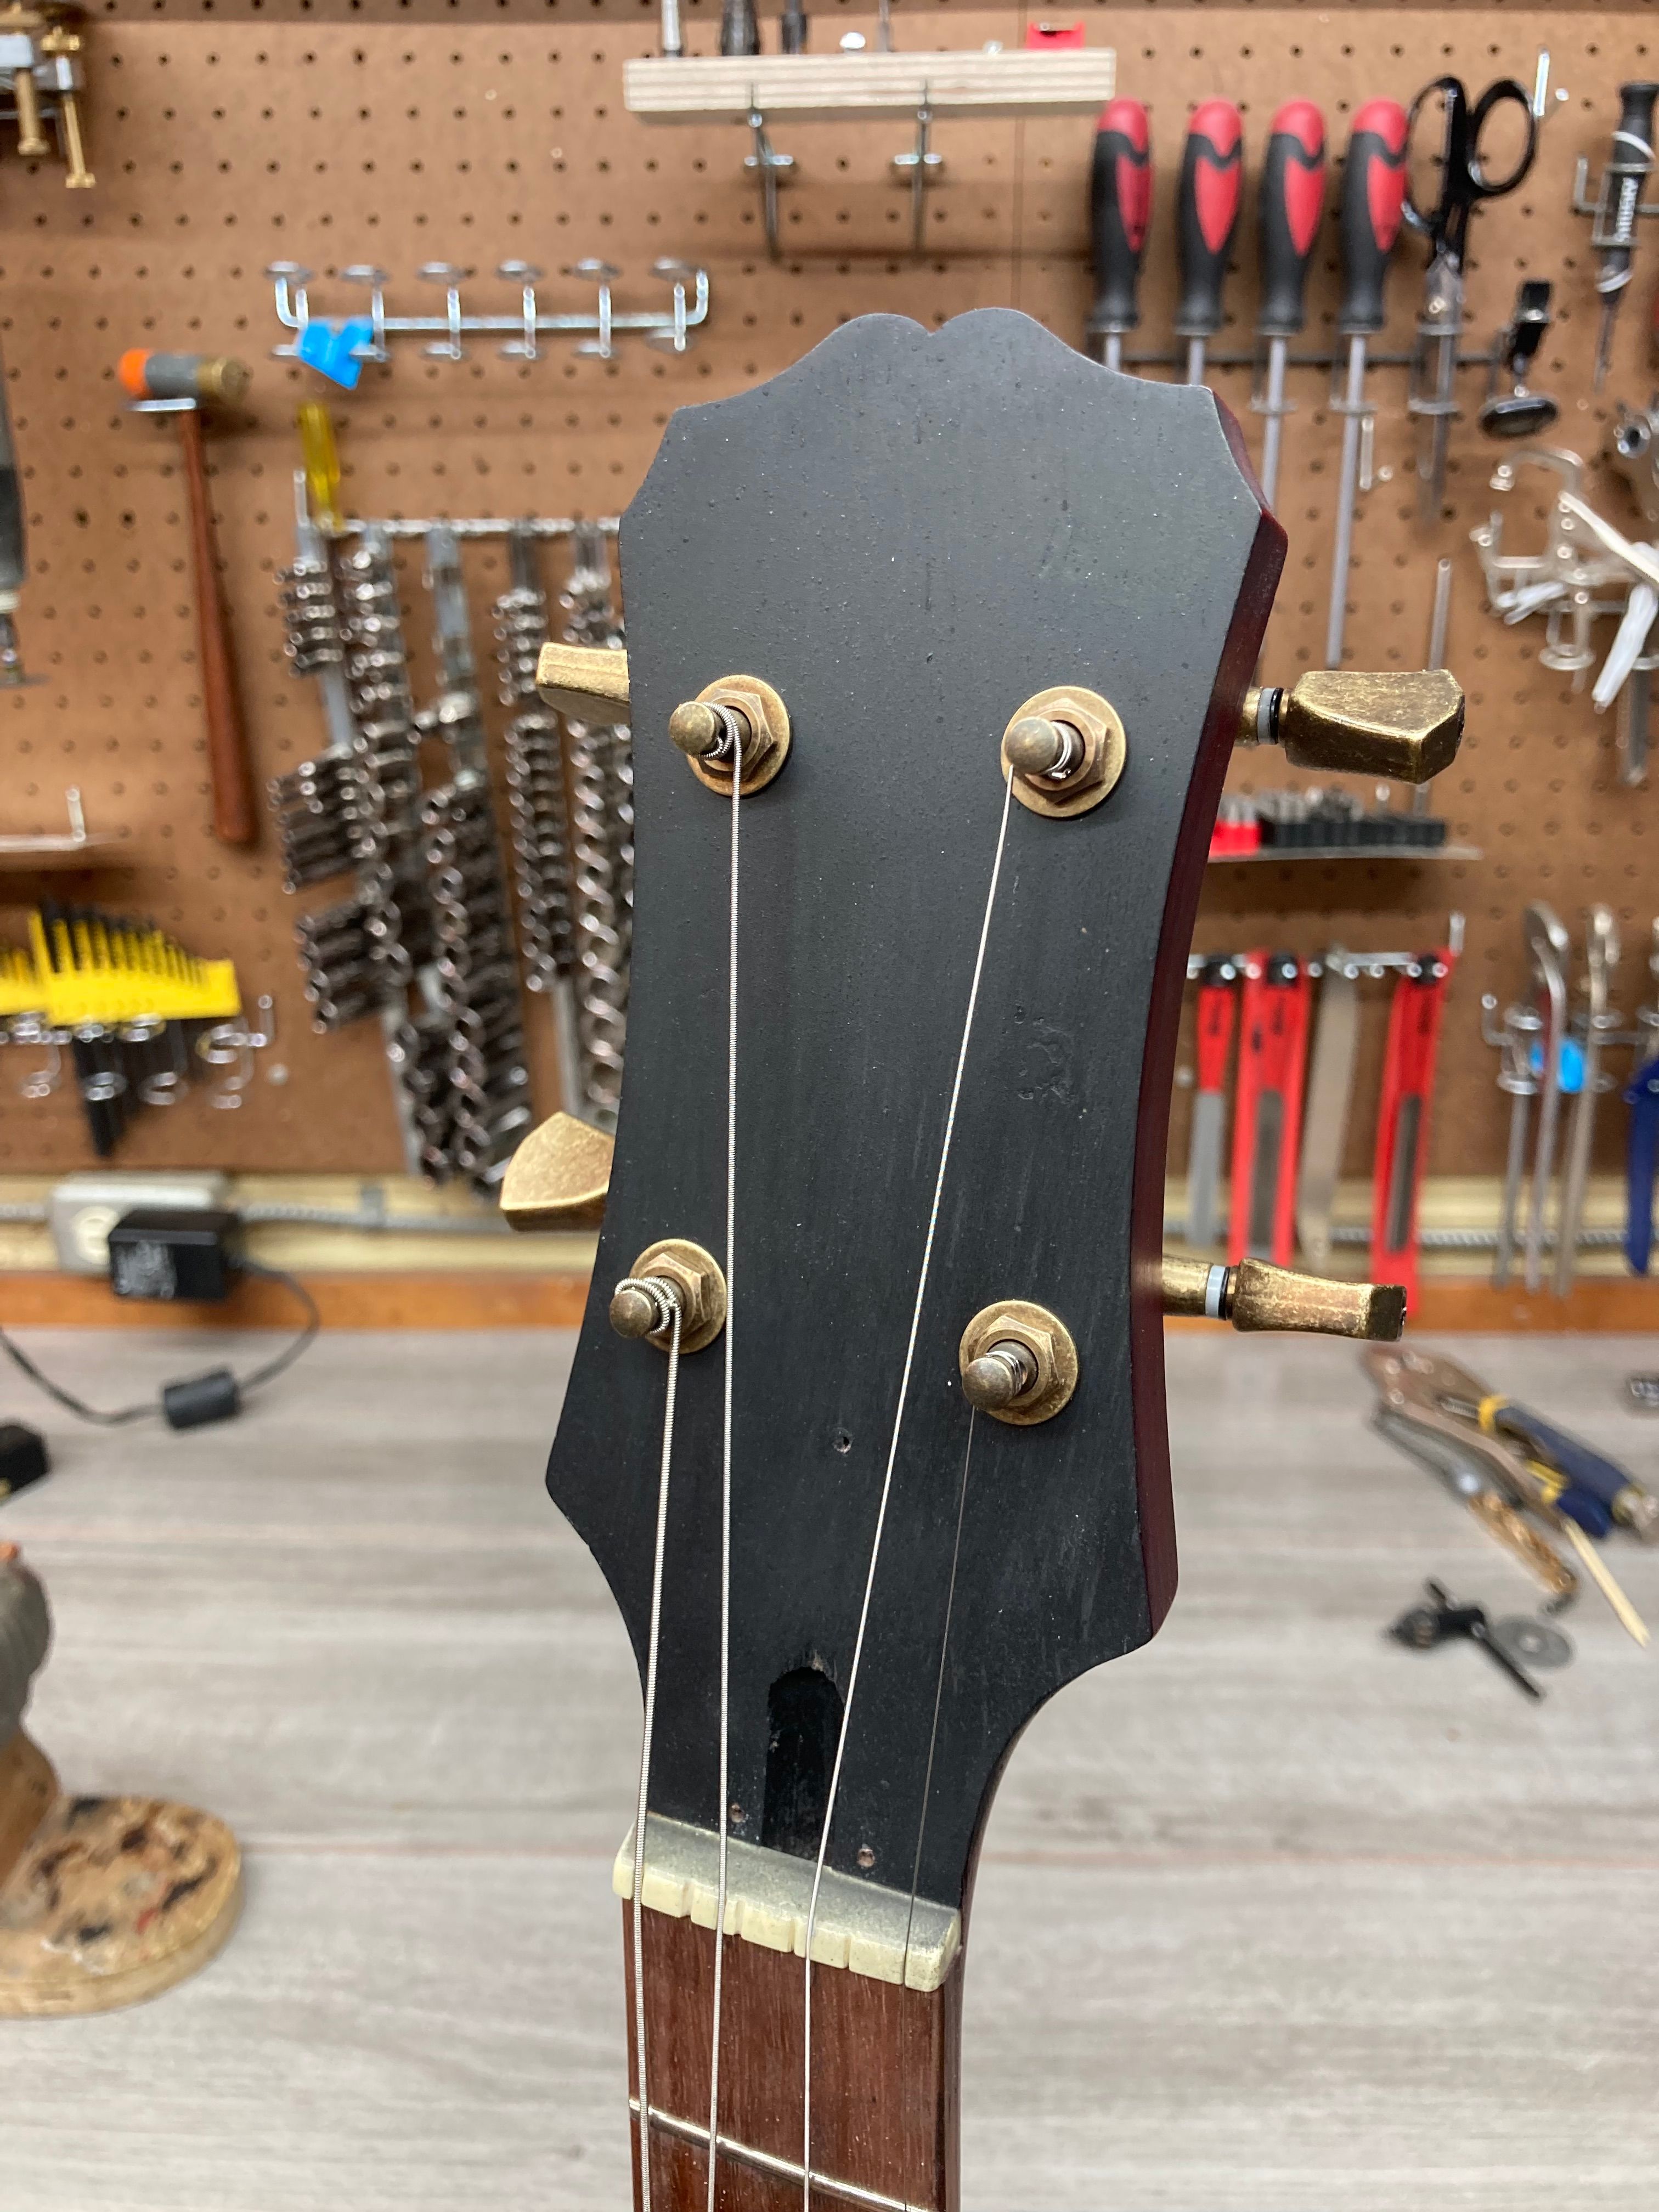
Eventually I will replace the nut, but for now I have made two new slots to space the strings.
This is what the body originally looked like...
 I may change my mind about this later on, but at the moment I am going to keep using the tune o matic bridge and tailpiece. I replaced them, as well as the knobs, switch, and pickup rings, to go with the new color scheme.

As for the tailpiece, I first had to drill new holes to space the 2nd and 3rd strings evenly between the 1st and 4th.

Next, I removed the 2nd and 5th string saddles from the bridge and filed notches in the 3rd and 4th string saddles to evenly space all 4 strings.

This doesn't look the greatest up close, but it does the job and it looks fine from a distance. Oh, I should mention that the saddles have piezos built in which is the reason for the wires coming out from underneath the bridge. That was an interesting project all by itself which I will share in another post!
That's all for now, but I'll keep you updated as it progresses!
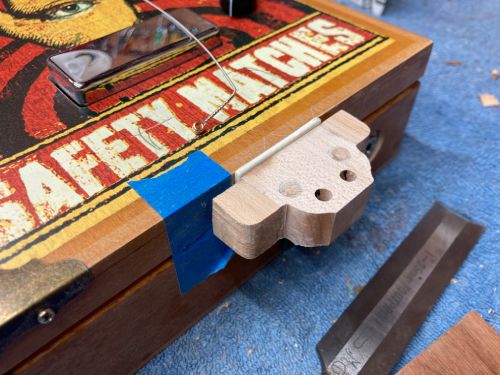
 Now it is glued in place, but oversized.