Viewing: Mojo Daddy Cigar Box Guitar - View all posts

Daddy Mojo guitar tailpiece modification part 3 

Now I will finish this project! The next step is to glue on a new laminate piece to match the one I removed. Here is a picture of the laminate being glued and clamped to the tailpiece.

Now it is glued in place, but oversized.

Here it is trimmed more closely to the tailpiece, but there is more to go...

Here it is with the laminate trimmed flush to the tailpiece, new holes drilled with the correct spacing, and a light satin finish applied to match the rest of the instrument. This customer was very happy with the work, and now he can play the guitar without the 4th string popping out of place!

Daddy Mojo guitar tailpiece modification part 2 

The work begins! I started by removing the bridge pins and sanding off the top laminate. I then filled the two outer bridge pin holes with dowels.

Next, I used a chisel to slice off the tops of the dowels to make them flush with the top of the tailpiece.

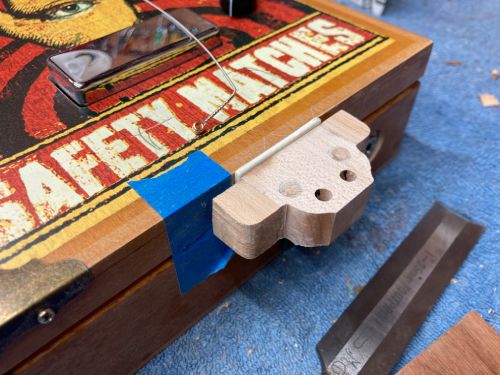
After that, I cut two pieces of maple with a similar grain pattern and glued them to either side of the tailpiece.

Once the glue was dry, I began shaping the tailpiece "wings" to blend in with the tailpiece.

In the next post, I will show how I finished it up!


Daddy Mojo guitar tailpiece modification 

Recently a customer brought me his Mojo Daddy cigar box guitar because the lowest string kept sliding out of the groove in the saddle. As you can see in the following picture, the bridge pins on the tailpiece are much more closely spaced than the strings are supposed to be on the saddle. Therefore, the highest and the lowest strings contact the saddle at too much of an angle to stay in place.

I decided to widen the tailpiece (which is actually part of the neck that runs through the body) in order to move the 2 outside bridge pins and provide a straight path for the strings over the saddle. In my next post, I will show you how that process played out...